


Valheim is a survival and exploration game with many fine reviews and is played by millions of people worldwide. But some Windows PC users said Valheim was slow, making their gaming experience worse. If you are also having trouble with Valheim stuttering and lagging, you should pay close attention to what this article says. This article shows our readers the tried-and-true ways to fix Valheim’s lagging, stuttering, and crashing problems. But before we look at the solutions, let’s figure out what might have caused the problem.
Why Exactly Is Valheim Lagging On Windows PC?
The following factors could have caused Valheim portal lags, FPS lags, server issues, or any other lagging problem when playing multiplayer.
1 – Game files that are corrupted or missing.
2 – Apps that use a lot of resources.
3 – Wireless connection issues.
4 – Outdated network adapter driver.
5 – Problems with the IP address.
6 – Issues with how the DNS is set up.
7 – Temporary files that take up a lot of space.
8 – Background apps that are not needed.
We’ve already looked at some things that might have caused the multiplayer game Valheim to lag. Now, let’s look at the potential solutions to these problems.
How To Easily Fix Valheim Lagging On Windows PC?
You can use the solutions listed below to eliminate Valheim stuttering or lagging on Windows PC.
Perform Game File Integrity Verification
If any game file is corrupted or missing, you might have problems like Valheim lagging slowly on your Windows PC. To fix these issues, it is vital to check the integrity of game files. You may follow these steps to do it.
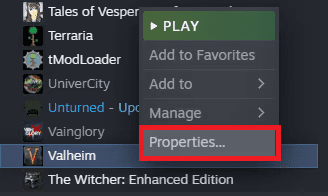
1 – Launch the Steam client and open the LIBRARY.
2 – Right-click Valheim and choose Properties from the list of options.

3 – Choose LOCAL FILES and check the game files’ integrity.
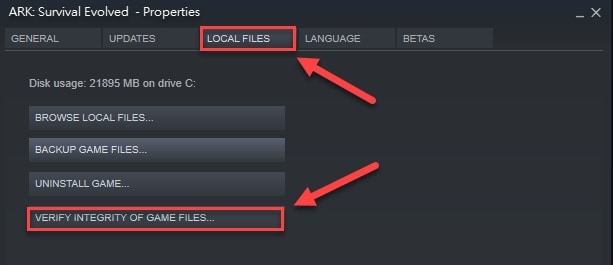

4 – After the verification process, try starting the game to see if the lag in the Valheim portal is fixed.
Close Apps That Hog The Bandwidth
Valheim FPS lags could also be caused by not having enough bandwidth. So, you should close the apps that use a lot of bandwidth and other resources.
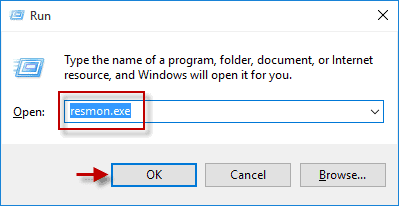
1 – Use the Windows+R command to launch the Run function.
2 – Type resmon into the box on your screen, hit the Enter key on your keyboard, or click OK.

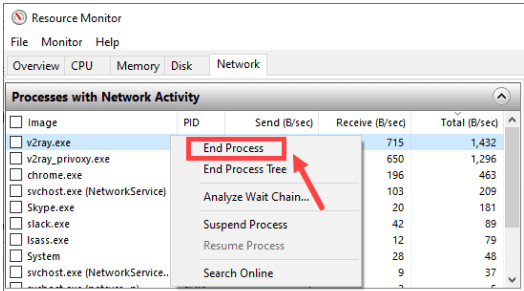
3 – Click Network in the top menu to see what your computer is doing on the network.
4 – Figure out which app uses a lot of bandwidth.
5 – Right-click on the app that’s using too many resources and choose the “End Process” option.

Note: Ensure you don’t accidentally close an important app that your computer needs to run well. If you need to learn more about an app, look it up online.
1 – Close the Resource Monitor exit.
2 – Start your game again after you’ve done the steps above to see if Valheim lagging on Windows PC is fixed.
Try Using A Wired Network Connection
Wireless connections can be easily messed up by factors like a device being out of range. So, switching to a wired network may fix the issues with the connection. So, you can use a wired network to fix the Valheim dedicated server lagging problem.
Release IP Address And Renew It
On a Windows PC, Valheim lagging issues could also be caused by issues with the IP address. So, to solve the problems, you can renew and get a new IP address.
1 – Right-click the Windows icon in the taskbar and pick Command Prompt (Admin)/Windows PowerShell (Admin).
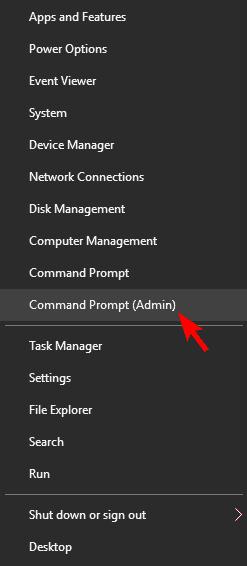

2 – If you see the User Account Control prompt, click “Yes.”
3 – Type the following commands one at a time and press the Enter key on your keyboard after each one.
ipconfig /release
ipconfig /flushdns
ipconfig /renew
4 – Close the Command Prompt window after running the above commands.
5 – Check to see if the problems are gone, or if you are still experiencing lag in Valheim multiplayer.
Change DNS Settings
Problems with the DNS settings are also a big reason Valheim runs slowly on Windows PC. So, you can fix the issues by switching to Google DNS. Here is how to do it, step by step.
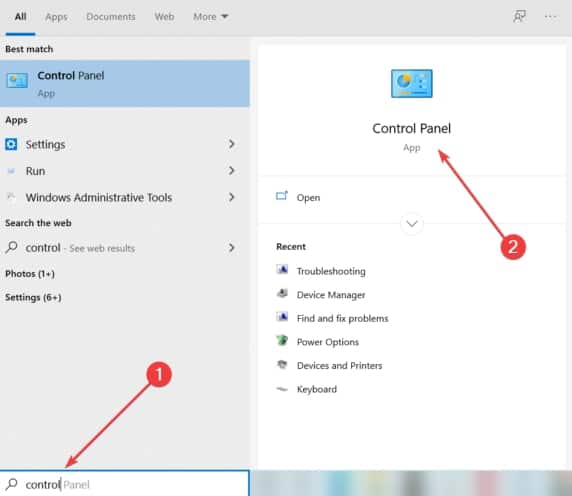
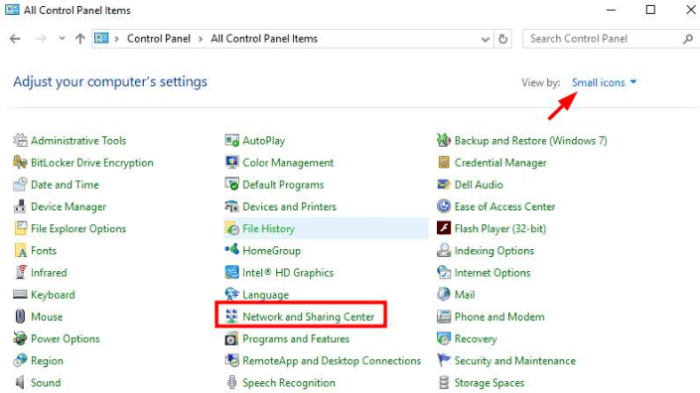
1 – Find your computer’s Control Panel and open it.

2 – Change the view in the Control Panel to Category.
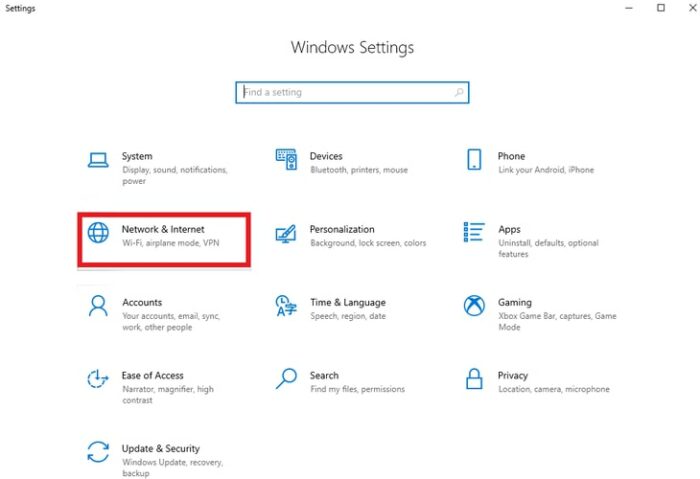
3 – Select Network and Internet from the Control Panel’s list of options.

4 – Choose Network and Sharing Center.

5 – Navigate to Connections and check if you are connected to WiFi, Ethernet, or any other network.
6 – Click on the connection you want.
7 – Choose the option that says “Properties.”
8 – Select Internet Protocol Version 4 (TCP/IPv4) and choose Properties.
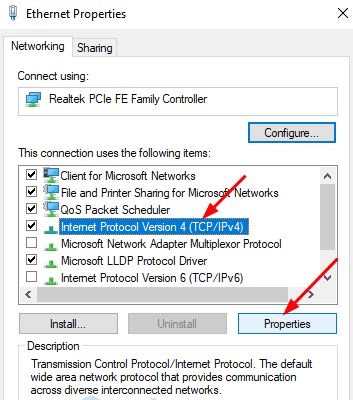

9 – In the Preferred DNS server column, type 8.8.8.8.
10 – In the column for the Alternate DNS server, type 8.8.4.4.
11 – Check the settings when you leave and click OK.
12 – Check to see if the problem is gone or if you still have trouble with Valheim stuttering.
Close Resource-hogging Background Apps
If your PC needs more resources for the game and you have a lot of apps running in the background that use up resources, you may have problems. So, you should close these apps to solve issues like Valheim from lagging. Here is a step-by-step list of what you need to do to turn off these apps.
1 – Press Windows+R on your keyboard to bring up the Run utility on your screen.
2 – Type taskmgr into the box on your screen and choose OK/press Enter.
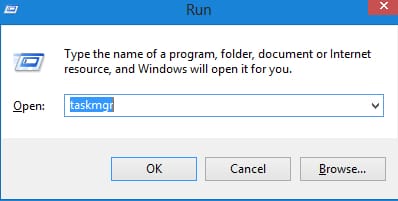

3 – Navigate to Processes.
4 – For tasks that use a lot of CPU, right-click and choose “End task.”
5 – After closing down the processes that were giving you trouble, check to see if the Valheim portal lags are rid.
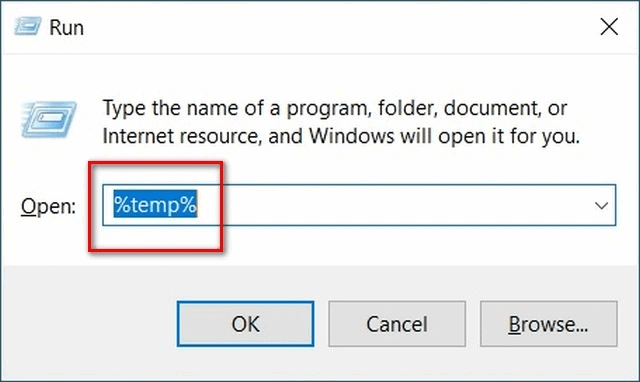
Remove Temporary Files
Temporary files that Windows or apps computer on your computer take up unnecessary space and slow it down. And they also make Valheim’s speed slow down. So, the best way to fix lag in your favorite game is to get rid of these temporary files. We’ll show you how to do it all below.
1 – Press the Windows+R keys on your keyboard to open the Run menu.
2 – Type %temp% into the box on the screen and press the Enter key on your keyboard.

3 – Use the shortcut Ctrl+A to select all temporary files, and then press Delete to remove them.
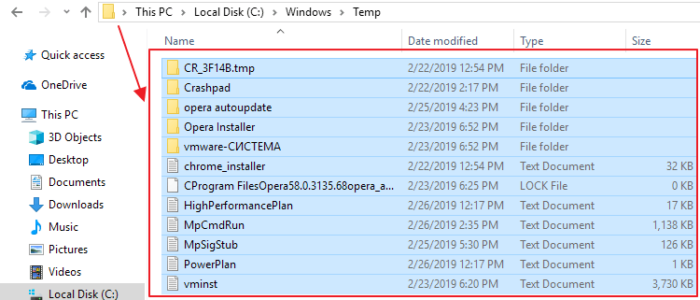

4 – Checkmark Do this for every current item and click Skip if you get This task can’t be done window.
5 – Now, right-click on the Recycle Bin on the desktop and select the option to Empty Recycle Bin.
6 – Choose “Yes” to delete all items permanently.
Conclusion:
This article showed you how to fix one of Valheim’s most annoying problems: stuttering, crashing and lagging. You can start troubleshooting with the first solution and keep trying all the fixes until the issue is fixed. Then, if you only have a little time, you can immediately update the old drivers on your computer to fix the problem. You can contact us through the comments section if you have any questions or doubts.